Take it easy, sit back and relax
Windows Remote Desktop (commonly known as RDP) is a built-in Windows remote desktop software that allows users to remotely access and control another computer over a network. It supports SSL encrypted connections, cross-platform compatibility, and seamless operation.
Setting aside cross-platform and operation aspects, let's talk about the SSL encrypted connection. Surprisingly, SSL encryption is enabled by default, but the certificate used is a self-signed certificate generated by Windows itself. I have no idea what Microsoft was thinking. This article will dive into modifying the Windows registry to change the Remote Desktop SSL certificate.
This should be the simplest method on the entire internet (I think)
When we remotely connect to a Windows computer, a window usually pops up telling us "The identity of this remote computer cannot be verified" - meaning the access address doesn't match the certificate.
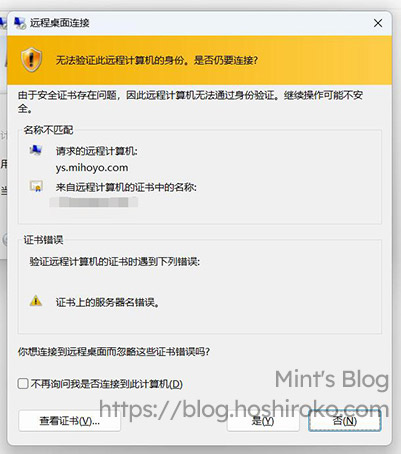
This is because during Windows installation, the system generates a certificate using the computer name as the domain, which is pretty useless.
You can click "Don't ask me again" and it'll be fine, but that only treats the symptoms, not the cause. If you connect from a different computer, you'll still get the error. So we need to find a way to replace the SSL certificate used by RDP in the system.
(It's not really about connection security, it's mainly about visual comfort)
1. Obtaining an SSL Certificate
SSL certificates are generally easy to obtain. The ones used for websites and RDP are actually the same. Major cloud providers like Tencent Cloud and Alibaba Cloud offer free SSL certificates valid for 1 year. Here are some places where you can get free SSL certificates:
- Alibaba Cloud (Certificate valid for 3 months) (No conversion needed)
- Tencent Cloud (
Certificate valid for 1 year) (Now also only 3 months, might as well use acme) (No conversion needed) - FreeSSL (Certificate valid for 3 months) (Haven't used it, not sure)
- acme.sh (Certificate valid for 3 months) (The one true god!)
These SSL certificates are not recommended to be paid for. Those enterprise-level top-tier encryption certificates aren't meant for ordinary people like us anyway (unless you're rich, then forget what I said)
2. Converting the SSL Certificate
(This step can be skipped if you obtained certificates from Alibaba Cloud or Tencent Cloud, as these two providers offer PFX certificate downloads)
The certificates Windows uses are different from the typical xxxxx.key and xxxxx.crt we normally use. Windows uses the PKCS#12 certificate standard, typically as xxxxx.pfx files. Since most certificates are issued in key and pem formats, we need to convert them to pfx for Windows to use.
Note! Legacy systems don't support the latest SSL encryption protocols, such as Windows Server 2012R2. Pay attention to the OpenSSL version when converting certificates for legacy systems.
Here we'll download OpenSSL for the conversion. The Win64 Light version is sufficient. OpenSSL 3.X versions don't support legacy systems like Windows Server 2012R2. If you need to use it on legacy systems, please download OpenSSL 1.X version! After downloading, install it to any directory and remember the installation path.
Open the /bin directory in your OpenSSL installation path, place the certificates you obtained there, and rename the pem and key files to myssl.pem and myssl.key.
After placing them, open cmd, cd to this directory, and enter the following command:
It will ask you to enter the private key password twice. Remember this password, as it's needed when adding the certificate.
Once complete, find the myssl.pfx file in this directory. This is our converted file. Save it for later use.
3. Adding the SSL Certificate
This step involves importing the downloaded or converted xxxxx.pfx certificate into the system.
I've looked at various tutorials, and they all involve complex steps like going to the mmc console, adding snap-ins, then adding certificate management snap-ins, etc.
I figured out a very simple method on my own. Simple, practical, and won't scare you away.
- Place the PFX certificate on your desktop (anywhere is fine, just for convenience), and double-click to enter the Certificate Import Wizard
- For storage location, select "Local Computer"
- For the import file, it's already selected, just click Next
- Enter the password - this is either the password included in your downloaded certificate zip file, or the password you entered twice during conversion
- For certificate storage location, select "Personal"
- Click Finish to complete the import
Now open Win+R, type certlm.msc, and navigate to Personal → Certificates to see the certificate we just added.
Select the newly added certificate, right-click → All Tasks → Manage Private Keys. Go to Users → Add → Advanced → Find Now. In the search results, find NETWORK SERVICE, double-click to add, and click OK.
In Users, find the NETWORK SERVICE we just added, select it, and set permissions to Read. After setting, click OK to exit.
Then double-click the certificate, find the Thumbprint in Details, and copy the value for later use.
At this point, the certificate is successfully added.
4. Configuring the SSL Certificate
There are three methods here, and I've personally tested that each one works.
None of these methods require a restart; changes take effect immediately upon saving.
Method 1: Using PowerShell (Works well on new systems, not supported on old systems)
Open PowerShell (Administrator) and enter:
Example:
Method 2: Using WMIC (Generally supported on old systems, gradually deprecated on new systems)
Open PowerShell (Administrator) and enter:
Example:
Method 3: Modifying the Registry (Universal, use this if the first two don't work)
Open the Registry Editor and navigate to the following path:
Create a new binary value named SSLCertificateSHA1Hash at this path, double-click it, and enter the SSL certificate thumbprint in the value data field. Click OK to confirm.
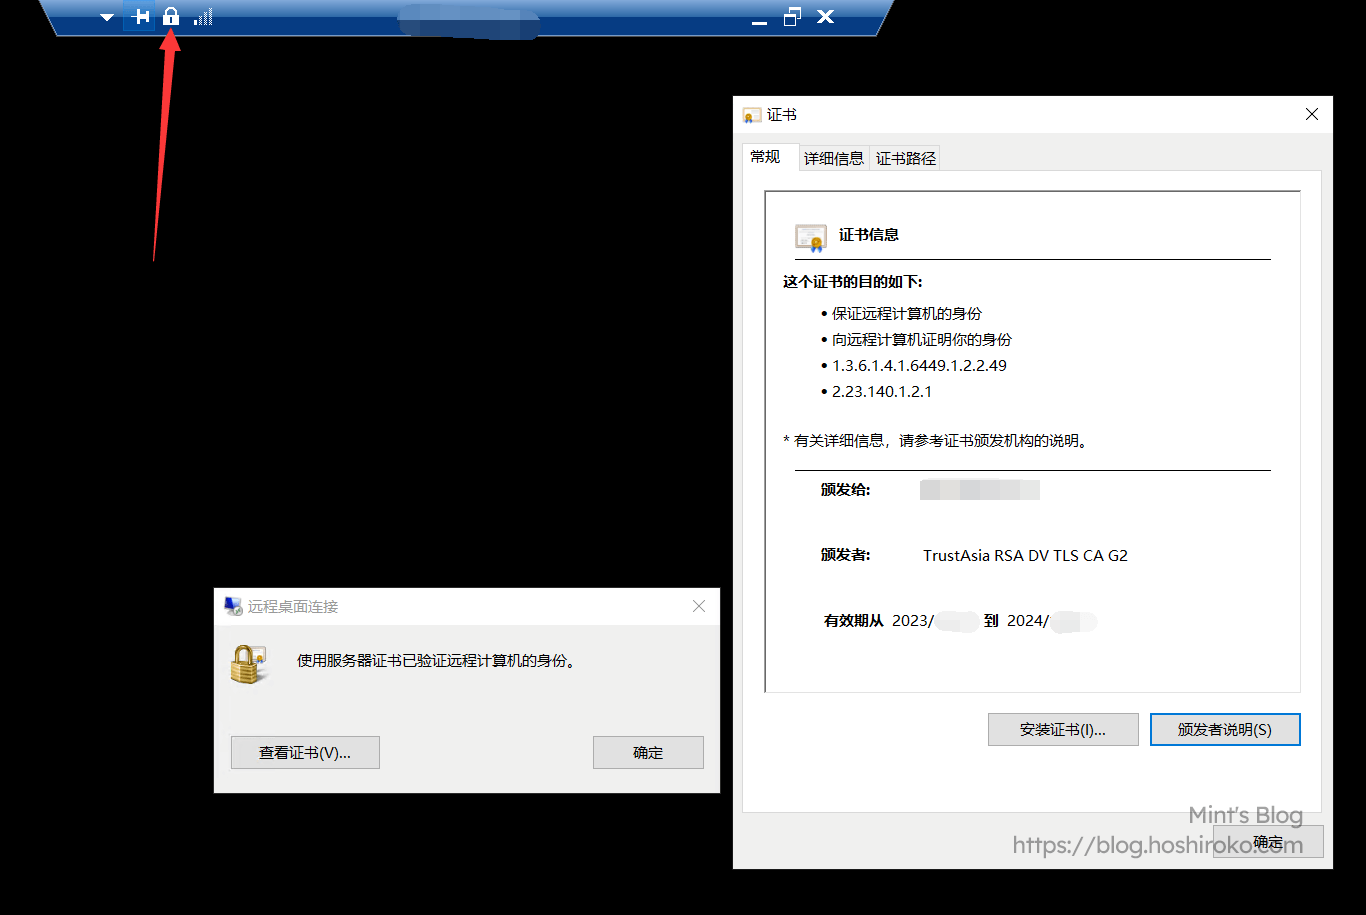
At this point, we're basically done with the configuration. You won't see the insecure connection popup anymore, and the connection will be more secure (much more comfortable)
Reference: Along's Notes (I borrowed this less than three hours after it was posted XD)